back to Manual
Attach a tag to any body or tissue that arrives at our facility as soon as feasible. You will frequently attach the tag to the immediate container rather than the tissue, but any shared container must have separate tags on each item it contains. When adding tissue to a container, moving between containers, or moving subcontainers, the organization of the tags on containers and in the Software should take place as close in time as possible to the movement of tissue. Organization can be done immediately before or immediately after the move.
Numbering System
The numbering system is designed to maintain strict privacy, and the short IDs are efficient for tracking. Because it is critical that the database which matches numbers with patients never be lost, there are rigorous backup and hard copy systems in place as described in Record Management.
Patient ID: These are in the form of P##, where ## is the patient.PatNum from the database without any preceding zeros. This is a 2 to 4 digit number. For example, P127 or P31.
Container ID: These are in the form of C##, where ## is the oc_container.ContainerNum from the database without any preceding zeros. For example, C263.
Tag Types
Embossed Tags: Made by a local trophy shop. Rounds, smooth, metal. Attach these to the pouches containing tissue. Always include the patient ID, and usually include other information such as patient's name, birthdate, and deanimation date.
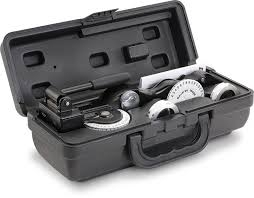
Aluminum Tags: Made with a Rhino embosser. Used for fast temporary tagging of tissue or bodies. See instructions below for use.
Rectangular Plates: These are custom ordered plates with lots of information that are attached to the exterior of containers. Metal or plastic.
Printed labels: If they won't be exposed to liquid, labels may be printed and taped to a container.
Examples:
Cryopreservation: Wrap item in either
-One layer of dacron wool and a cotton pouch or
-Knit acrylic pouch
Tie the pouch with string or wire. Fasten an embossed tag to the pouch.
Neurocan: Attach an embossed tag using wire through a hole. Once the neurocan is full, create a rectangular plate containing a list of all contents. Rivet the plate to the top of the lid so it's visible from above. These can include names, etc.
Dewar: Print a list of all neurocans and contents of each neurocan, including names of patients, dates, etc. Place in waterproof cover or laminate. Hang from dewar handle. Do not tape to the dewar because that can pull off paint or leave tape residue.
Rhino Embosser Use

The tag machine must not ever be contaminated with infectious material. Making tags is done in an office or workshop setting without wearing gloves. The embosser is difficult to use, and you must have hands-on training. One reason for the P prefix on patient tags is to prevent numbers such as 909 from being misread as 606. For example, P909. Do not use any other symbols, numbers, or preceding zeros. Punch a hole in the end, cut it to the proper length, and round the sharp ends.
(photo to be posted soon)
Use wire, suture, or rivets to attach the tag. If attaching to tissue, the wire must pass through strong connective tissue, and must pose no risk to neural tissue. To remove a tag, snip the wire (but see the restrictions below on removing tags from tissue).
Tag Form
Prior to attaching or moving any tag, a Tag Form must be filled out. That form has detailed instructions on the proper process to follow for tagging.
